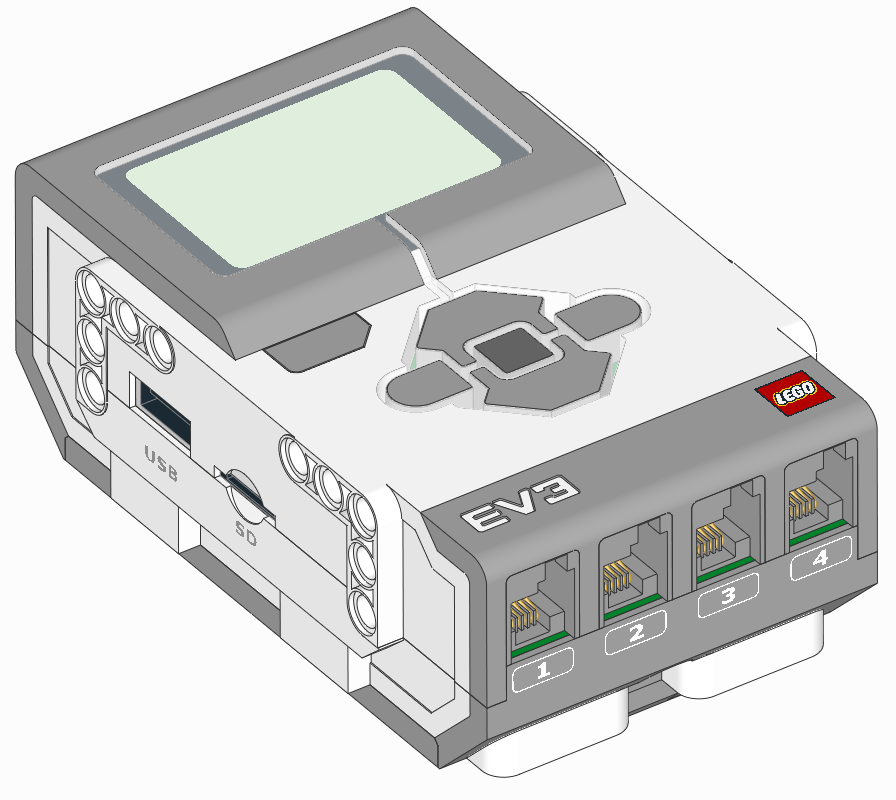
可编程集线器

class EV3Brick
乐高® MINDSTORMS® EV3 编程块。
使用按钮
buttons.pressed()
检查当前按下的按钮。
| 返回: | 按下按钮的列表。 |
| 返回类型: | 按钮列表 |
使用编程块状态灯
light.on(color)
以指定颜色打开灯光。
| 参数: | color (Color) – 光的颜色。如果选择 “无” 或不可用的颜色,则指示灯将关闭。 |
示例:打开灯并改变颜色
#!/usr/bin/env pybricks-micropython

from pybricks.hubs import EV3Brick
from pybricks.tools import wait
from pybricks.parameters import Color

# Initialize the EV3
ev3 = EV3Brick()

# Turn on a red light
ev3.light.on(Color.RED)

# Wait
wait(1000)

# Turn the light off
ev3.light.off()
light.off()
关灯。
使用扬声器
speaker.beep(frequency=500, duration=100)
播放哔哔声/提示音。
| 参数: |
|
|---|
speaker.play_notes(notes, tempo=120)
播放一系列音符。
例如,您可以玩: ['C4/4', 'C4/4', 'G4/4', 'G4/4'] 。
| 参数: |
|
音符格式
每个音符都是具有以下格式的字符串:
- 第一个字符是音符的名称,A 到 G 或 R 休息。
- 音符名称还可以包含临时 #(升号)或 b(平坦)。 不允许使用 B#/Cb 和 E#/Fb。
- 音符名称后面跟着八度音阶数字 2 到 8.例如,C4 是中间的 C。八度音阶变为音符 C 处的下一个数字,例如,B3 是中音 C (C4) 下方的音符。
- 八度音程后面跟着 / 和一个表示音符大小的数字。例如,/4 是四分音符, /8 是八分音符,依此类推。
- 可以选择后跟 . 以制作虚线注释。附点音符的长度是没有点的音符的 1-1/2 倍。
- 音符可以选择以 _ 结尾,这是平局或连线。这导致这个音符和下一个音符之间没有停顿。
speaker.play_file(file_name)
播放声音文件。
| 参数: | file_name (str) – 声音文件的路径,包括文件扩展名。 |
speaker.say(text)
说给定的文本字符串。
您可以使用以下命令配置文本的语言和语音 set_speech_options() 的。
| 参数: | text (str) – 要说什么。 |
speaker.set_speech_options(language=None, voice=None, speed=None, pitch=None)
配置 say() 方法使用的语音设置。
设置为 “无” 的任何选项都不会更改。如果选项设置为无效值,则 say() 将改用默认值。
| 参数: |
|
可用的语言和语音
你可以选择以下语言:
- 'af': 南非荷兰语
- 'an':阿拉贡语
- 'bg':保加利亚语
- 'bs':波斯尼亚语
- 'ca':加泰罗尼亚语
- 'cs':捷克语
- 'cy':威尔士语
- 'da':丹麦语
- 'de':德语
- 'el':希腊语
- 'en':英语(默认)
- 'en-gb':英语(英国)
- 'en-sc':Français(苏格兰)
- 'en-uk-north':英语(英国,北部)
- 'en-uk-rp': Français(英国,发音)
- 'en-uk-wmids':英语(英国,西米德兰兹郡)
- 'en-us':Français(美国)
- 'en-wi':英语(西印度群岛)
- 'eo':世界语
- 'es':西班牙语
- 'es-la':西班牙语(拉丁美洲)
- 'and':爱沙尼亚语
- 'fa':波斯语
- 'fa-pin':波斯语
- 'fi':芬兰语
- 'fr-be':法语(比利时)
- 'fr-fr':法语(法国)
- 'ga':爱尔兰语
- 'grc':希腊语
- 'hi':印地语
- 'hr':克罗地亚语
- 'hu': 匈牙利语
- 'hy':亚美尼亚语
- 'hy-west':亚美尼亚语(西方)
- 'id':印度尼西亚语
- 'is':冰岛语
- 'it':意大利语
- 'jbo':洛伊班语
- 'ka' 作为格鲁吉亚语
- 'kn':卡纳达语
- 'ku':库尔德语
- 'la':拉丁语
- 'lfn':新通用语
- 'lt':立陶宛语
- 'lv':拉脱维亚语
- 'mk':马其顿语
- 'ml':马拉雅拉姆语
- 'ms':马来语
- 'ne':尼泊尔语
- 'nl':荷兰语
- 'no':挪威语
- 'pa':旁遮普语
- 'pl':波兰语
- 'pt-br':葡萄牙语(巴西)
- 'pt-pt':葡萄牙语(葡萄牙)
- 'ro':罗马尼亚语
- 'ru':俄语
- 'sk':斯洛伐克语
- 'sq':阿尔巴尼亚语
- 'sr':塞尔维亚语
- 'sv':瑞典语
- 'sw':斯瓦希里语
- 'ta':泰米尔语
- 'tr':土耳其语
- 'vi':越南语
- 'vi-hue':越南语(顺化)
- 'vi-sgn':越南语(西贡)
- 'zh':普通话
- 'zh-yue':粤语
您可以选择以下声音:
- 'f1':女性变体 1
- 'f2':女性变体 2
- 'f3':女性变体 3
- 'f4':女性变体 4
- 'f5':女性变体 5
- 'M1':男性变体 1
- 'm2':男性变体 2
- 'm3':男性变体 3
- 'm4':男性变体 4
- 'M5':男性变体 5
- 'M6':男性变体 6
- 'M7':男性变体 7
- 'croak': 呱呱叫
- 'whisper':耳语
- 'whisperf':女性耳语
speaker.set_volume(volume, which='_all_')
设置扬声器音量。
| 参数: |
|
使用屏幕
screen.clear()
清除屏幕。屏幕上的所有像素都将设置为 颜色.白色 。
screen.draw_text(x, y, text, text_color=Color.BLACK, background_color=None)
在屏幕上绘制文本。
将使用使用 set_font() 的最新字体集或 Font.DEFAULT,如果尚未设置字体。
| 参数: |
|
screen.print(*args, sep=' ', end='\n')
在屏幕上打印一行文本。
此方法的工作原理类似于内置的 print() 函数,但它在屏幕上写入。
您可以使用 set_font() 设置字体。如果未设置字体, Font.DEFAULT 将被使用。文本始终使用白色背景的黑色文本打印。
与内置的 print() 不同,如果文本太宽而无法放在屏幕上,则不会换行。它只是被切断了。但是,如果文本会从屏幕底部消失,则整个图像将向上滚动,并将文本打印在屏幕底部的新空白区域中。
| 参数: |
|
示例:打个招呼...用几个方式。
#!/usr/bin/env pybricks-micropython

from pybricks.hubs import EV3Brick
from pybricks.tools import wait
from pybricks.media.ev3dev import Font

# It takes some time for fonts to load from file, so it is best to only
# load them once at the beginning of the program like this:
tiny_font = Font(size=6)
big_font = Font(size=24, bold=True)
chinese_font = Font(size=24, lang='zh-cn')

# Initialize the EV3
ev3 = EV3Brick()

# Say hello
ev3.screen.print('Hello!')

# Say tiny hello
ev3.screen.set_font(tiny_font)
ev3.screen.print('hello')

# Say big hello
ev3.screen.set_font(big_font)
ev3.screen.print('HELLO')

# Say Chinese hello
ev3.screen.set_font(chinese_font)
ev3.screen.print('你好')

# Wait some time to look at the screen
wait(5000)screen.set_font(font)
设置用于在屏幕上书写的字体。
该字体用于 draw_text() 和 print()。
| 参数: | font ( 字体 ) – 要使用的字体。 |
例: 请参阅 print() 中的示例。
screen.load_image(source)
清除此图像,然后在屏幕中央绘制源图像。
| 参数: | source (Image 或 str) – 源 Image。如果参数是字符串,则从文件加载源图像。 |
示例:在屏幕上显示图像。
#!/usr/bin/env pybricks-micropython

from pybricks.hubs import EV3Brick
from pybricks.tools import wait
from pybricks.media.ev3dev import Image, ImageFile

# It takes some time to load images from the SD card, so it is best to load
# them once at the beginning of a program like this:
ev3_img = Image(ImageFile.EV3_ICON)

# Initialize the EV3
ev3 = EV3Brick()

# Show an image
ev3.screen.load_image(ev3_img)

# Wait some time to look at the image
wait(5000)screen.draw_image(x, y, source, transparent=None)
在屏幕上绘制源图像。
| 参数: |
|
screen.draw_pixel(x, y, color=Color.BLACK)
在屏幕上绘制单个像素。
| 参数: |
|
screen.draw_line(x1, y1, x2, y2, width=1, color=Color.BLACK)
在屏幕上画一条线。
| 参数: |
|
示例:在屏幕上绘制一些形状。
#!/usr/bin/env pybricks-micropython

from pybricks.hubs import EV3Brick
from pybricks.tools import wait

# Initialize the EV3
ev3 = EV3Brick()

# Draw a rectangle
ev3.screen.draw_box(10, 10, 40, 40)

# Draw a solid rectangle
ev3.screen.draw_box(20, 20, 30, 30, fill=True)

# Draw a rectangle with rounded corners
ev3.screen.draw_box(50, 10, 80, 40, 5)

# Draw a circle
ev3.screen.draw_circle(25, 75, 20)

# Draw a triangle using lines
x1, y1 = 65, 55
x2, y2 = 50, 95
x3, y3 = 80, 95
ev3.screen.draw_line(x1, y1, x2, y2)
ev3.screen.draw_line(x2, y2, x3, y3)
ev3.screen.draw_line(x3, y3, x1, y1)

# Wait some time to look at the shapes
wait(5000)screen.draw_box(x1, y1, x2, y2, r=0, fill=False, color=Color.BLACK)
在屏幕上绘制一个框。
| 参数: |
|
例: 请参阅 draw_line() 中的示例。
screen.draw_circle(x, y, r, fill=False, color=Color.BLACK)
在屏幕上画一个圆圈。
| 参数: |
|
例: 请参阅 draw_line() 中的示例。
screen.width
获取屏幕的宽度(以像素为单位)。
screen.height
获取屏幕的高度(以像素为单位)。
screen.save(filename)
将屏幕保存为 .png 文件。
| 参数: |
filename (str) – 要保存的文件的路径。 |
| 异常: |
|
使用电池
battery.voltage()
获取电池的电压。
| 返回: | 电池电压。 |
| 返回类型: | 电压:mV |
battery.current()
获取电池提供的电流。
| 返回: | 电池电流。 |
| 返回类型: | 电流:mA |
 EV3机器人

