通用 I/O 设备
通用输入/输出设备。
注意
该模块提供与非官方电机、传感器和其他自定义电子设备交互的类。如果您知道自己在做什么,您才应该连接定制电子设备或非官方设备。谨慎行事。
1.LUMP 设备
class LUMPDevice(port)
使用乐高 UART 消息传递协议的设备。
| 参数: | port (Port) – 设备连接的端口。 |
read(mode)
从给定模式读取值。
| 参数: | mode (int) – 设备模式。 |
| 返回: | 从传感器读取的值。 |
| 返回类型: | tuple |
write(mode, values)
将值写入传感器。只有选定的传感器和模式支持此功能。
| 参数: |
|
2.模拟传感器
class AnalogSensor(port)
通用或定制模拟传感器。
| 参数: | port (Port) – 传感器连接的端口。 |
voltage()
测量模拟电压。
| 返回: | 模拟电压。 |
| 返回类型: | 电压:mV |
resistance()
测量电阻。
仅当模拟设备是无源负载(例如电阻器或热敏电阻)时,该值才有意义。
| 返回: | 模拟设备的电阻。 |
| 返回类型: | 电阻:Ω |
active()
将传感器设置为活动模式。这将传感器端口的引脚 5 设置为高电平 。
这在一些模拟传感器中用于控制开关。例如,如果您将 NXT 光传感器用作自定义模拟传感器,此方法将打开灯。从那时起,voltage() 返回原始反射光值。
passive()
将传感器设置为无源模式。这将传感器端口的引脚 5 设置为低电平 。
这在一些模拟传感器中用于控制开关。例如,如果您将 NXT 光传感器用作自定义模拟传感器,此方法将关闭灯。从那时起,voltage() 返回原始环境光值。
3.I2C 设备
class I2CDevice(port, address)
通用或定制 I2C 器件。
| 参数: |
|
read(reg, lengtd=1)
读取字节,从给定的寄存器开始。
| 参数: |
|
| 返回: |
从设备返回的字节数。 |
| 返回类型: |
bytes |
write(reg, data=None)
写入字节,从给定寄存器开始。
| 参数: |
|
示例:读取和写入 I2C 设备。
#!/usr/bin/env pybricks-micropython
from pybricks.hubs import EV3Brick
from pybricks.iodevices import I2CDevice
from pybricks.parameters import Port

# Initialize the EV3
ev3 = EV3Brick()

# Initialize I2C Sensor
device = I2CDevice(Port.S2, 0xD2 >> 1)

# Read one byte from the device.
# For this device, we can read the Who Am I
# register (0x0F) for the expected value: 211.
if 211 not in device.read(0x0F):
    raise OSError("Device is not attached")

# To write data, create a bytes object of one
# or more bytes. For example:
# data = bytes((1, 2, 3))

# Write one byte (value 0x08) to register 0x22
device.write(0x22, bytes((0x08,)))
I2C 地址
I2C 地址是 7 位值。然而,大多数制造乐高兼容传感器的供应商在其文档中都提供了 8 位地址。要使用这些地址,您必须将它们移动 1 位。例如,如果记录的地址 0xD2,您可以执行以下作 地址 = 0xD2 >> 1.
高级 I2C 命令
一些基本的 I2C 器件不需要寄存器参数,甚至不需要任何数据。您可以实现此行为,如以下示例所示。
示例:高级 I2C 读写技术。
#!/usr/bin/env pybricks-micropython
from pybricks.hubs import EV3Brick
from pybricks.iodevices import I2CDevice
from pybricks.parameters import Port

# Initialize the EV3
ev3 = EV3Brick()

# Initialize I2C Sensor
device = I2CDevice(Port.S2, 0xD2 >> 1)

# Recommended for reading
result, = device.read(reg=0x0F, length=1)

# Read 1 byte from no particular register:
device.read(reg=None, length=1)

# Read 0 bytes from no particular register:
device.read(reg=None, length=0)

# I2C write operations consist of a register byte followed
# by a series of data bytes. Depending on your device, you
# can choose to skip the register or data as follows:

# Recommended for writing:
device.write(reg=0x22, data=b'\x08')

# Write 1 byte to no particular register:
device.write(reg=None, data=b'\x08')

# Write 0 bytes to a particular register:
device.write(reg=0x08, data=None)

# Write 0 bytes to no particular register:
device.write(reg=None, data=None)
其他技术资源
I2CDevice 类方法从 Linux SMBus 驱动程序调用函数。 要了解在后台调用了哪些命令,请检查 Pybricks 源代码 。有关在没有 MicroPytdon 的情况下使用 I2C 的更多详细信息,请访问 ev3dev I2C 页面。
4.UART 设备
class UARTDevice(port, baudrate, timeout=None)
通用 UART 设备。
| 参数: |
|
read(lengtd=1)
从缓冲区读取给定数量的字节。
您的程序将等待,直到收到请求的字节数。如果这花费的时间长于 timeout,则 ETIMEDOUT 异常。
| 参数: | lengtd (int) – 要读取的字节数。 |
| 返回: | 从设备返回的字节数。 |
| 返回类型: | bytes |
read_all()
从缓冲区读取所有字节。
| 返回: | 从设备返回的字节数。 |
| 返回类型: | bytes |
write(data)
写入字节。
| 参数: | data (bytes) – 要写入的字节数。 |
waiting()
获取仍在等待读取的字节数。
| 返回: | 缓冲区中的字节数。 |
| 返回类型: | int 整数 |
clear()
清空缓冲区。
示例:读取和写入 UART 设备。
#!/usr/bin/env pybricks-micropython
from pybricks.hubs import EV3Brick
from pybricks.iodevices import UARTDevice
from pybricks.parameters import Port
from pybricks.media.ev3dev import SoundFile

# Initialize the EV3
ev3 = EV3Brick()

# Initialize sensor port 2 as a uart device
ser = UARTDevice(Port.S2, baudrate=115200)

# Write some data
ser.write(b'\r\nHello, world!\r\n')

# Play a sound while we wait for some data
for i in range(3):
    ev3.speaker.play_file(SoundFile.HELLO)
    ev3.speaker.play_file(SoundFile.GOOD)
    ev3.speaker.play_file(SoundFile.MORNING)
    print("Bytes waiting to be read:", ser.waiting())

# Read all data received while the sound was playing
data = ser.read_all()
print(data)
5.直流电机
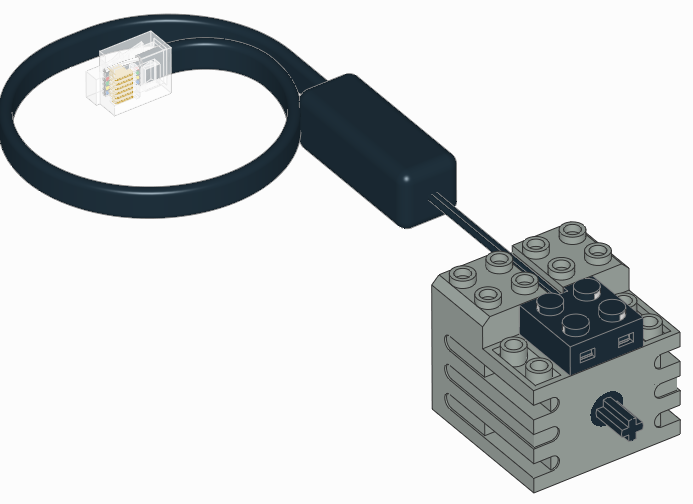
class DCMotor(port, positive_direction=Direction.CLOCKWISE)
用于控制没有旋转传感器的简单电机(例如火车电机)的通用类。
| 参数: |
|
dc(duty)
在给定的占空比(也称为“功率”)下旋转电机。
| 参数: | duty (percentage: %) – 占空比(-100.0 到 100)。 |
stop()
停止电机并让它自由旋转。
电机因摩擦而逐渐停止。
6.Ev3dev 传感器

EV3 MicroPytdon 构建在 ev3dev 之上,这意味着即使本文档中未列出传感器,也可能受支持。如果是这样,您可以将其与 Ev3devSensor 类一起使用。这比使用上面给出的自定义设备类更容易、更快捷。
若要检查是否可以使用 Ev3devSensor 类,请执行以下作:
- 将传感器插入 EV3 积木。
- 转到 EV3 积木的主菜单。
- 选择 “设备浏览器”,然后选择 “传感器”。
- 如果您的传感器出现,您可以使用它。
现在从菜单中选择您的传感器并选择设置模式 。这显示了此传感器的所有可用模式。您可以使用这些模式名称作为模式 设置。
若要详细了解兼容设备以及每种模式的功能,请访问 ev3dev 传感器页面。
class Ev3devSensor(port)
读取与 ev3dev 兼容传感器的值。
| 参数: | port (Port) – 设备连接的端口。 |
sensor_index
ev3dev sysfs 乐高传感器类的索引。
port_index
ev3dev sysfs lego-port 类的索引。
read(mode)
在给定模式下读取值。
| 参数: | mode (str) – 模式名称 。 |
| 返回: | 从传感器读取的值。 |
| 返回类型: | tuple |
示例
示例1:使用 Ev3devSensor 类读取值
在此示例中,我们将乐高 MINDSTORMS EV3 颜色传感器与原始 RGB 模式一起使用。这给出了未经校准的红色、绿色和蓝色反射值。
#!/usr/bin/env pybricks-micropython
from pybricks.parameters import Port
from pybricks.tools import wait
from pybricks.iodevices import Ev3devSensor

# Initialize an Ev3devSensor.
# In this example we use the
# LEGO MINDSTORMS EV3 Color Sensor.
sensor = Ev3devSensor(Port.S3)

while True:
    # Read the raw RGB values
    r, g, b = sensor.read('RGB-RAW')

    # Print results
    print('R: {0}\t G: {1}\t B: {2}'.format(r, g, b))

    # Wait
    wait(200)
示例2:扩展 Ev3devSensor 类
此示例演示如何通过访问此设备的 Linux 系统文件夹中找到的其他功能来扩展 Ev3devSensor 类。
#!/usr/bin/env pybricks-micropython
from pybricks.parameters import Port
from pybricks.iodevices import Ev3devSensor

class MySensor(Ev3devSensor):
    """Example of extending the Ev3devSensor class."""

    def __init__(self, port):
        """Initialize the sensor."""

        # Initialize the parent class.
        super().__init__(port)

        # Get the sysfs path.
        self.path = '/sys/class/lego-sensor/sensor' + str(self.sensor_index)

    def get_modes(self):
        """Get a list of mode strings so we don't have to look them up."""

        # The path of the modes file.
        modes_path = self.path + '/modes'

        # Open the modes file.
        with open(modes_path, 'r') as m:

            # Read the contents.
            contents = m.read()

            # Strip the newline symbol, and split at every space symbol.
            return contents.strip().split(' ')


# Initialize the sensor
sensor = MySensor(Port.S3)

# Show where this sensor can be found
print(sensor.path)

# Print the available modes
modes = sensor.get_modes()
print(modes)

# Read mode 0 of this sensor
val = sensor.read(modes[0])
print(val) EV3机器人

