ESP32 OTA(空中升级)接口使用(简化API)
一、概述
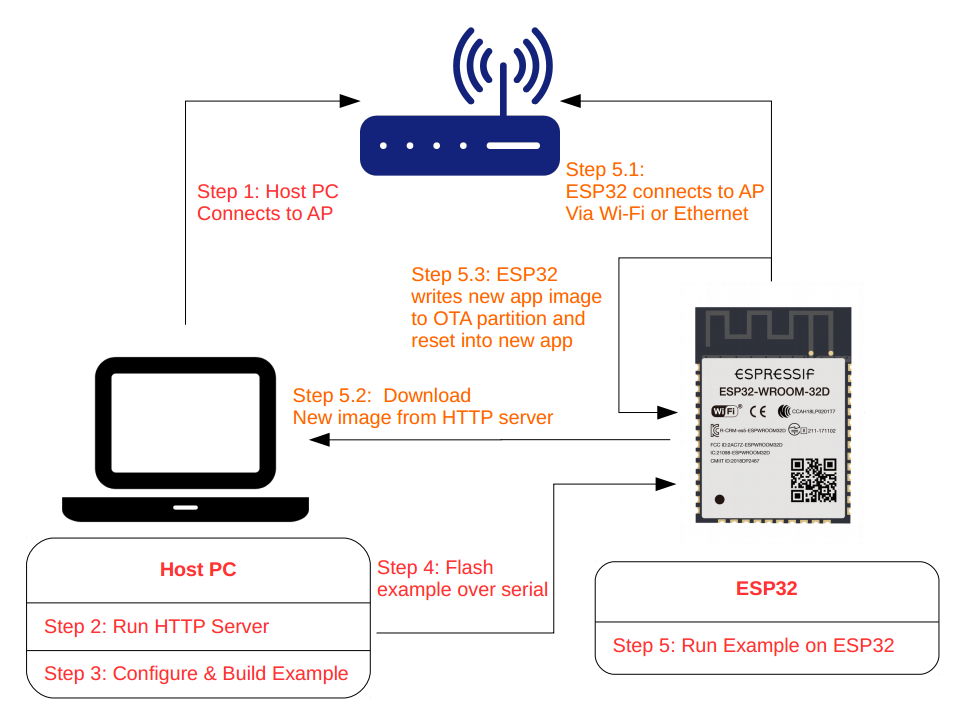
ESP32应用程序可以在运行时通过Wi-Fi或以太网从特定的服务器下载新映像,然后将其闪存到某些分区中,从而进行升级。
在ESP-IDF中有两种方式可以进行空中(OTA)升级:
- 使用 app_update 组件提供的原生API
- 使用 esp_https_ota 组件提供的简化API,它在原生OTA API上添加了一个抽象层,以便使用HTTPS协议进行升级。
分别在 native_ota_example 和 simple_ota_example 下的OTA示例中演示了这两种方法。
1.1 OTA工作流程
1.2 OTA数据分区
ESP32 SPI Flash 内有与升级相关的(至少)四个分区:OTA data、Factory App、OTA_0、OTA_1。其中 FactoryApp 内存有出厂时的默认固件。
首次进行 OTA 升级时,OTA Demo 向 OTA_0 分区烧录目标固件,并在烧录完成后,更新 OTA data 分区数据并重启。
系统重启时获取 OTA data 分区数据进行计算,决定此后加载 OTA_0 分区的固件执行(而不是默认的 Factory App 分区内的固件),从而实现升级。
同理,若某次升级后 ESP32 已经在执行 OTA_0 内的固件,此时再升级时 OTA Demo 就会向 OTA_1 分区写入目标固件。再次启动后,执行 OTA_1 分区实现升级。以此类推,升级的目标固件始终在 OTA_0、OTA_1 两个分区之间交互烧录,不会影响到出厂时的 Factory App 固件。
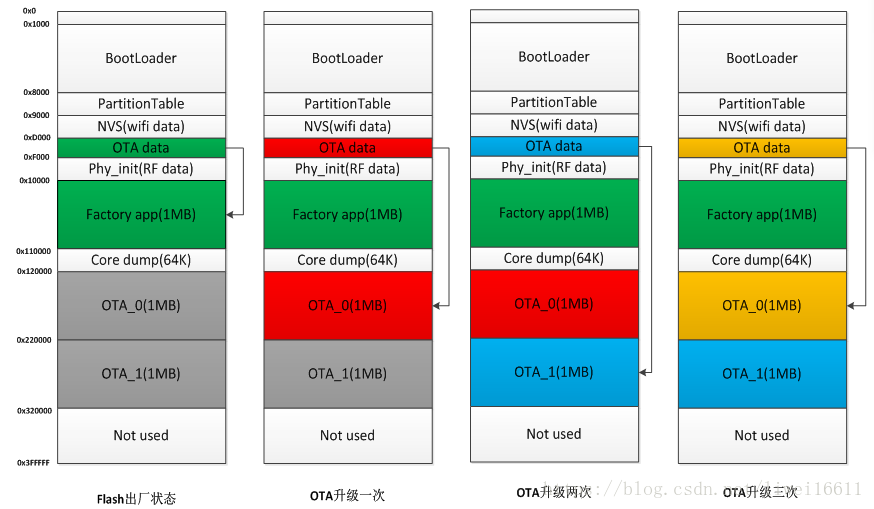
为了简单起见,OTA示例通过在menuconfig中启用CONFIG_PARTITION_TABLE_TWO_OTA选项来选择预定义的分区表,该选项支持三个应用程序分区:工厂分区、OTA_0分区和OTA_1分区。有关分区表的更多信息,请参阅分区表.
二、API说明
简化的 API 以通过 HTTPS 执行固件升级。它是原生 OTA API 的抽象层。
以下简化 OTA 接口位于 esp_https_ota/include/esp_https_ota.h。
2.1 esp_https_ota
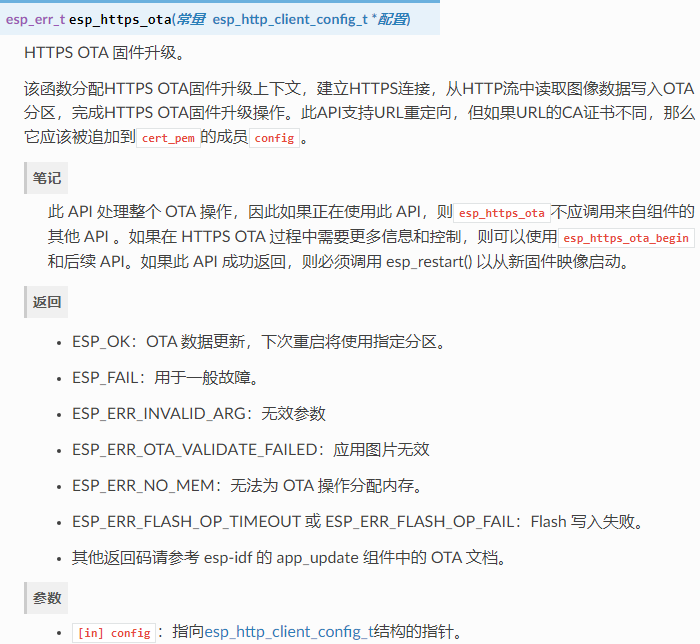
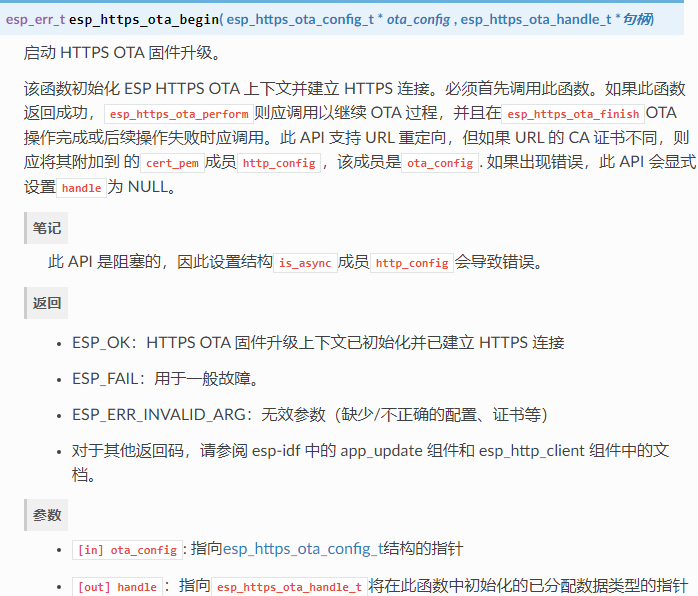
2.2 esp_https_ota_begin
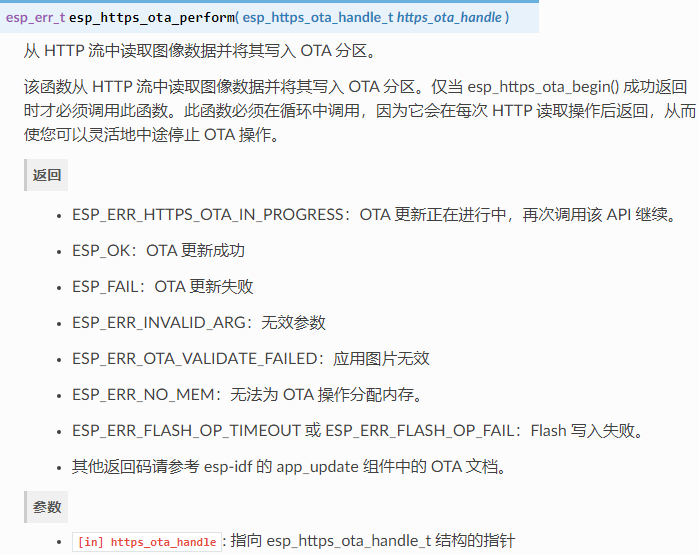
2.3 esp_https_ota_perform
 2.4 esp_https_ota_is_complete_data_received
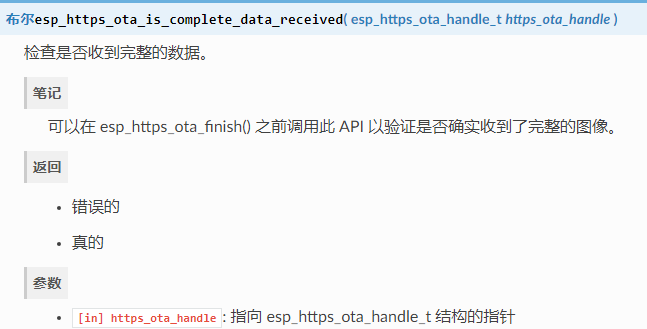
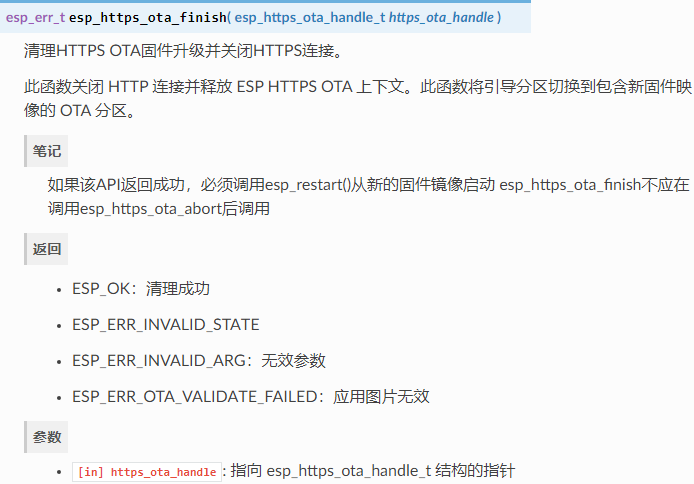
2.5 esp_https_ota_finish
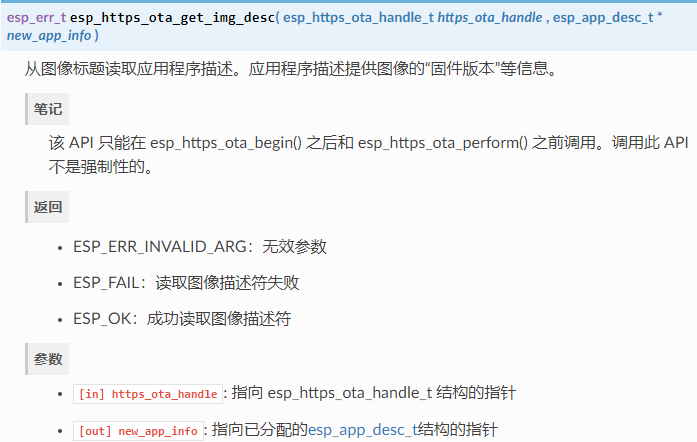
2.6 esp_https_ota_get_img_desc
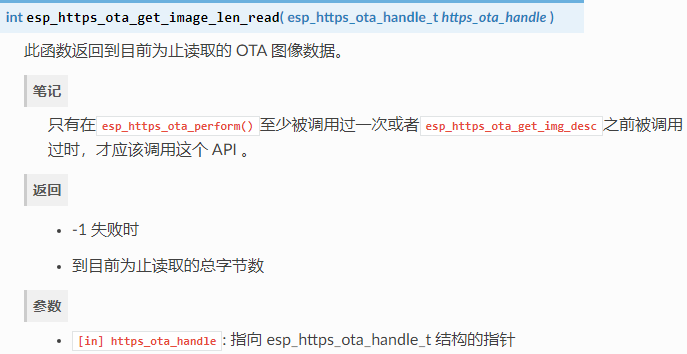
2.7 esp_https_ota_get_image_len_read
三、应用实例
3.1 OTA详细过程逻辑
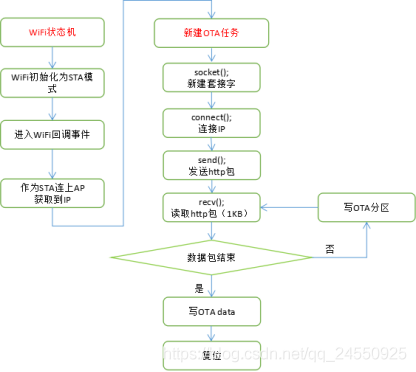
3.2 简单版
使用 esp-idf\examples\system\ota\simple_ota_example 中的例程
/* OTA example

   This example code is in the Public Domain (or CC0 licensed, at your option.)

   Unless required by applicable law or agreed to in writing, this
   software is distributed on an "AS IS" BASIS, WITHOUT WARRANTIES OR
   CONDITIONS OF ANY KIND, either express or implied.
*/
#include "freertos/FreeRTOS.h"
#include "freertos/task.h"
#include "esp_system.h"
#include "esp_event.h"
#include "esp_log.h"
#include "esp_ota_ops.h"
#include "esp_http_client.h"
#include "esp_https_ota.h"
#include "protocol_examples_common.h"
#include "string.h"

#include "nvs.h"
#include "nvs_flash.h"
#include "protocol_examples_common.h"

#if CONFIG_EXAMPLE_CONNECT_WIFI
#include "esp_wifi.h"
#endif

static const char *TAG = "simple_ota_example";
extern const uint8_t server_cert_pem_start[] asm("_binary_ca_cert_pem_start");
extern const uint8_t server_cert_pem_end[] asm("_binary_ca_cert_pem_end");

#define OTA_URL_SIZE 256

esp_err_t _http_event_handler(esp_http_client_event_t *evt)
{
    switch (evt->event_id) {
    case HTTP_EVENT_ERROR:
        ESP_LOGD(TAG, "HTTP_EVENT_ERROR");
        break;
    case HTTP_EVENT_ON_CONNECTED:
        ESP_LOGD(TAG, "HTTP_EVENT_ON_CONNECTED");
        break;
    case HTTP_EVENT_HEADER_SENT:
        ESP_LOGD(TAG, "HTTP_EVENT_HEADER_SENT");
        break;
    case HTTP_EVENT_ON_HEADER:
        ESP_LOGD(TAG, "HTTP_EVENT_ON_HEADER, key=%s, value=%s", evt->header_key, evt->header_value);
        break;
    case HTTP_EVENT_ON_DATA:
        ESP_LOGD(TAG, "HTTP_EVENT_ON_DATA, len=%d", evt->data_len);
        break;
    case HTTP_EVENT_ON_FINISH:
        ESP_LOGD(TAG, "HTTP_EVENT_ON_FINISH");
        break;
    case HTTP_EVENT_DISCONNECTED:
        ESP_LOGD(TAG, "HTTP_EVENT_DISCONNECTED");
        break;
    }
    return ESP_OK;
}

void simple_ota_example_task(void *pvParameter)
{
    ESP_LOGI(TAG, "Starting OTA example");

    esp_http_client_config_t config = {
        .url = CONFIG_EXAMPLE_FIRMWARE_UPGRADE_URL,
        .cert_pem = (char *)server_cert_pem_start,
        .event_handler = _http_event_handler,
    };

#ifdef CONFIG_EXAMPLE_FIRMWARE_UPGRADE_URL_FROM_STDIN
    char url_buf[OTA_URL_SIZE];
    if (strcmp(config.url, "FROM_STDIN") == 0) {
        example_configure_stdin_stdout();
        fgets(url_buf, OTA_URL_SIZE, stdin);
        int len = strlen(url_buf);
        url_buf[len - 1] = '\0';
        config.url = url_buf;
    } else {
        ESP_LOGE(TAG, "Configuration mismatch: wrong firmware upgrade image url");
        abort();
    }
#endif

#ifdef CONFIG_EXAMPLE_SKIP_COMMON_NAME_CHECK
    config.skip_cert_common_name_check = true;
#endif

    esp_err_t ret = esp_https_ota(&config);
    if (ret == ESP_OK) {
        esp_restart();
    } else {
        ESP_LOGE(TAG, "Firmware upgrade failed");
    }
    while (1) {
        vTaskDelay(1000 / portTICK_PERIOD_MS);
    }
}

void app_main(void)
{
    // Initialize NVS.
    esp_err_t err = nvs_flash_init();
    if (err == ESP_ERR_NVS_NO_FREE_PAGES || err == ESP_ERR_NVS_NEW_VERSION_FOUND) {
        // 1.OTA app partition table has a smaller NVS partition size than the non-OTA
        // partition table. This size mismatch may cause NVS initialization to fail.
        // 2.NVS partition contains data in new format and cannot be recognized by this version of code.
        // If this happens, we erase NVS partition and initialize NVS again.
        ESP_ERROR_CHECK(nvs_flash_erase());
        err = nvs_flash_init();
    }
    ESP_ERROR_CHECK(err);

    ESP_ERROR_CHECK(esp_netif_init());
    ESP_ERROR_CHECK(esp_event_loop_create_default());

    /* This helper function configures Wi-Fi or Ethernet, as selected in menuconfig.
     * Read "Establishing Wi-Fi or Ethernet Connection" section in
     * examples/protocols/README.md for more information about this function.
     */
    ESP_ERROR_CHECK(example_connect());

#if CONFIG_EXAMPLE_CONNECT_WIFI
    /* Ensure to disable any WiFi power save mode, this allows best throughput
     * and hence timings for overall OTA operation.
     */
    esp_wifi_set_ps(WIFI_PS_NONE);
#endif // CONFIG_EXAMPLE_CONNECT_WIFI

    xTaskCreate(&simple_ota_example_task, "ota_example_task", 8192, NULL, 5, NULL);
}
3.3 进阶版
如果在 HTTPS OTA 过程中需要更多信息和控制,则可以
使用 esp-idf\examples\system\ota\advanced_https_ota 中的例程
/* Advanced HTTPS OTA example

   This example code is in the Public Domain (or CC0 licensed, at your option.)

   Unless required by applicable law or agreed to in writing, this
   software is distributed on an "AS IS" BASIS, WITHOUT WARRANTIES OR
   CONDITIONS OF ANY KIND, either express or implied.
*/
#include <string.h>
#include "freertos/FreeRTOS.h"
#include "freertos/task.h"
#include "freertos/event_groups.h"
#include "esp_system.h"
#include "esp_event.h"
#include "esp_log.h"
#include "esp_ota_ops.h"
#include "esp_http_client.h"
#include "esp_https_ota.h"
#include "nvs.h"
#include "nvs_flash.h"
#include "protocol_examples_common.h"

#if CONFIG_EXAMPLE_CONNECT_WIFI
#include "esp_wifi.h"
#endif

static const char *TAG = "advanced_https_ota_example";
extern const uint8_t server_cert_pem_start[] asm("_binary_ca_cert_pem_start");
extern const uint8_t server_cert_pem_end[] asm("_binary_ca_cert_pem_end");

#define OTA_URL_SIZE 256

static esp_err_t validate_image_header(esp_app_desc_t *new_app_info)
{
    if (new_app_info == NULL) {
        return ESP_ERR_INVALID_ARG;
    }

    const esp_partition_t *running = esp_ota_get_running_partition();
    esp_app_desc_t running_app_info;
    if (esp_ota_get_partition_description(running, &running_app_info) == ESP_OK) {
        ESP_LOGI(TAG, "Running firmware version: %s", running_app_info.version);
    }

#ifndef CONFIG_EXAMPLE_SKIP_VERSION_CHECK
    if (memcmp(new_app_info->version, running_app_info.version, sizeof(new_app_info->version)) == 0) {
        ESP_LOGW(TAG, "Current running version is the same as a new. We will not continue the update.");
        return ESP_FAIL;
    }
#endif

    return ESP_OK;
}

void advanced_ota_example_task(void *pvParameter)
{
    ESP_LOGI(TAG, "Starting Advanced OTA example");

    esp_err_t ota_finish_err = ESP_OK;
    esp_http_client_config_t config = {
        .url = CONFIG_EXAMPLE_FIRMWARE_UPGRADE_URL,
        .cert_pem = (char *)server_cert_pem_start,
        .timeout_ms = CONFIG_EXAMPLE_OTA_RECV_TIMEOUT,
    };

#ifdef CONFIG_EXAMPLE_FIRMWARE_UPGRADE_URL_FROM_STDIN
    char url_buf[OTA_URL_SIZE];
    if (strcmp(config.url, "FROM_STDIN") == 0) {
        example_configure_stdin_stdout();
        fgets(url_buf, OTA_URL_SIZE, stdin);
        int len = strlen(url_buf);
        url_buf[len - 1] = '\0';
        config.url = url_buf;
    } else {
        ESP_LOGE(TAG, "Configuration mismatch: wrong firmware upgrade image url");
        abort();
    }
#endif

#ifdef CONFIG_EXAMPLE_SKIP_COMMON_NAME_CHECK
    config.skip_cert_common_name_check = true;
#endif

    esp_https_ota_config_t ota_config = {
        .http_config = &config,
    };

    esp_https_ota_handle_t https_ota_handle = NULL;
    esp_err_t err = esp_https_ota_begin(&ota_config, &https_ota_handle);
    if (err != ESP_OK) {
        ESP_LOGE(TAG, "ESP HTTPS OTA Begin failed");
        vTaskDelete(NULL);
    }

    esp_app_desc_t app_desc;
    err = esp_https_ota_get_img_desc(https_ota_handle, &app_desc);
    if (err != ESP_OK) {
        ESP_LOGE(TAG, "esp_https_ota_read_img_desc failed");
        goto ota_end;
    }
    err = validate_image_header(&app_desc);
    if (err != ESP_OK) {
        ESP_LOGE(TAG, "image header verification failed");
        goto ota_end;
    }

    while (1) {
        err = esp_https_ota_perform(https_ota_handle);
        if (err != ESP_ERR_HTTPS_OTA_IN_PROGRESS) {
            break;
        }
        // esp_https_ota_perform returns after every read operation which gives user the ability to
        // monitor the status of OTA upgrade by calling esp_https_ota_get_image_len_read, which gives length of image
        // data read so far.
        ESP_LOGD(TAG, "Image bytes read: %d", esp_https_ota_get_image_len_read(https_ota_handle));
    }

    if (esp_https_ota_is_complete_data_received(https_ota_handle) != true) {
        // the OTA image was not completely received and user can customise the response to this situation.
        ESP_LOGE(TAG, "Complete data was not received.");
    }

ota_end:
    ota_finish_err = esp_https_ota_finish(https_ota_handle);
    if ((err == ESP_OK) && (ota_finish_err == ESP_OK)) {
        ESP_LOGI(TAG, "ESP_HTTPS_OTA upgrade successful. Rebooting ...");
        vTaskDelay(1000 / portTICK_PERIOD_MS);
        esp_restart();
    } else {
        if (ota_finish_err == ESP_ERR_OTA_VALIDATE_FAILED) {
            ESP_LOGE(TAG, "Image validation failed, image is corrupted");
        }
        ESP_LOGE(TAG, "ESP_HTTPS_OTA upgrade failed %d", ota_finish_err);
        vTaskDelete(NULL);
    }
}

void app_main(void)
{
    // Initialize NVS.
    esp_err_t err = nvs_flash_init();
    if (err == ESP_ERR_NVS_NO_FREE_PAGES || err == ESP_ERR_NVS_NEW_VERSION_FOUND) {
        // 1.OTA app partition table has a smaller NVS partition size than the non-OTA
        // partition table. This size mismatch may cause NVS initialization to fail.
        // 2.NVS partition contains data in new format and cannot be recognized by this version of code.
        // If this happens, we erase NVS partition and initialize NVS again.
        ESP_ERROR_CHECK(nvs_flash_erase());
        err = nvs_flash_init();
    }
    ESP_ERROR_CHECK( err );

    ESP_ERROR_CHECK(esp_netif_init());
    ESP_ERROR_CHECK(esp_event_loop_create_default());

    /* This helper function configures Wi-Fi or Ethernet, as selected in menuconfig.
     * Read "Establishing Wi-Fi or Ethernet Connection" section in
     * examples/protocols/README.md for more information about this function.
    */
    ESP_ERROR_CHECK(example_connect());

#if CONFIG_EXAMPLE_CONNECT_WIFI
    /* Ensure to disable any WiFi power save mode, this allows best throughput
     * and hence timings for overall OTA operation.
     */
    esp_wifi_set_ps(WIFI_PS_NONE);
#endif // CONFIG_EXAMPLE_CONNECT_WIFI

    xTaskCreate(&advanced_ota_example_task, "advanced_ota_example_task", 1024 * 8, NULL, 5, NULL);
}
四、测试流程
4.1 配置Flash大小
打开项目配置菜单 idf.py menuconfig
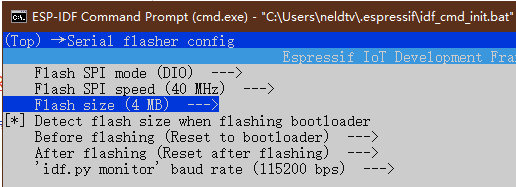
选择串行Flash配置 Serial flasher config --->
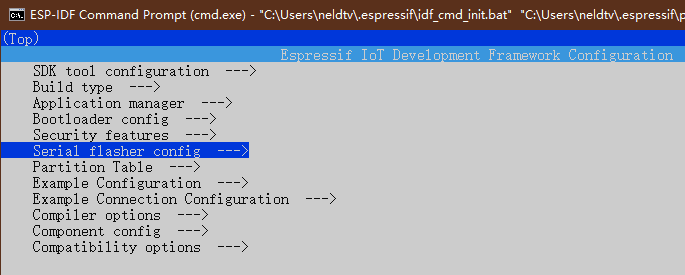
根据模块Flash大小,更改 Flash size,我使用的是 ESP32-WROVER-B 模组,所以修改为 4 MB。
4.2 配置分区表
选择分区表配置 Partition Table --->
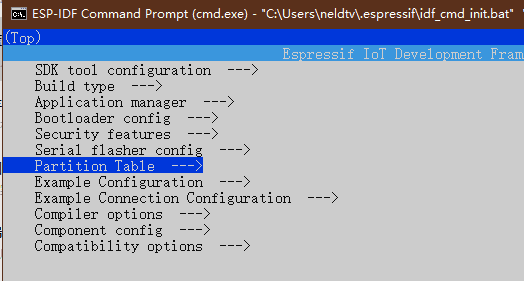
选择 Factory app, two OTA definitions

4.3 配置服务器信息
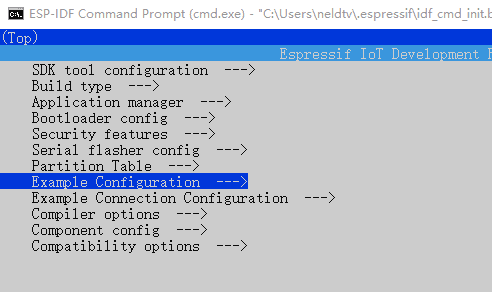
4.3.1 HTTPS类型

4.3.2 HTTP类型
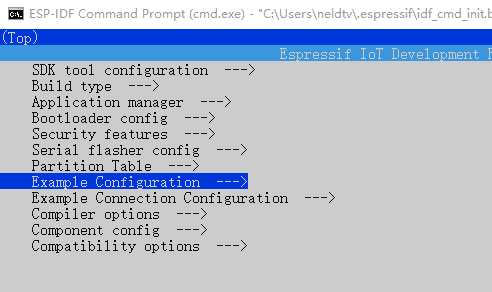
将类型修改为 http

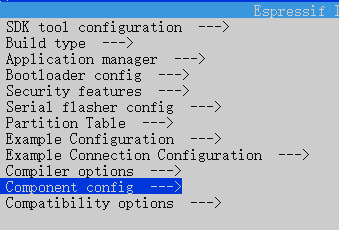
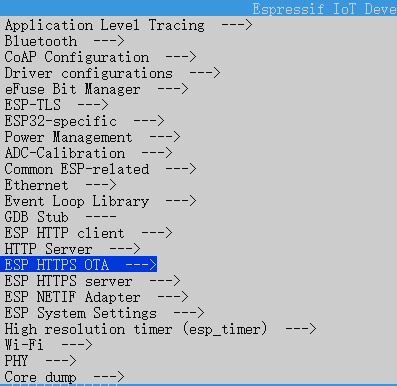

在代码中注释

4.4 配置连接方式
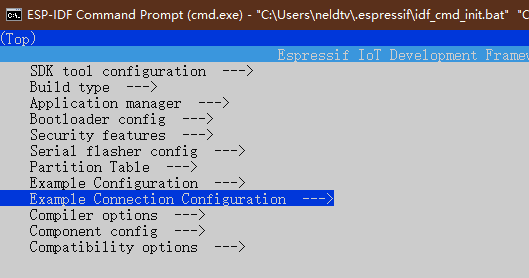
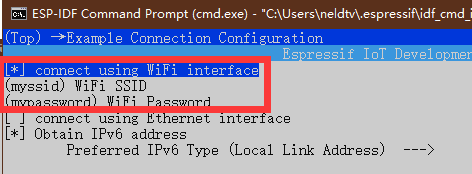
选择WIFI连接方式,并修改要连接路由器的SSID和密码
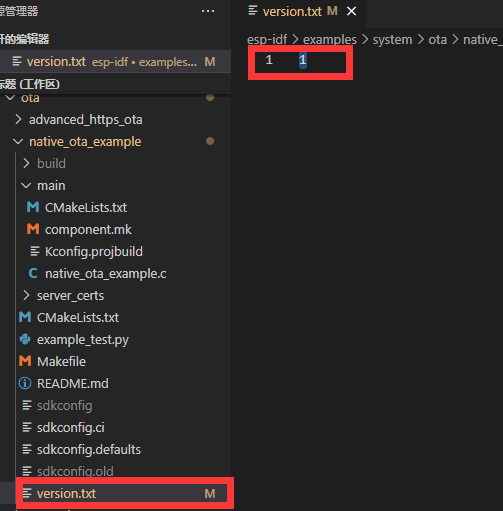
4.5 配置APP版本号
Note: native_ota_example 中没有版本号大小检查,它看到不同的版本就会下载。当本地设备是比OTA服务器版本号更高的时候,也会下载OTA服务器的旧版进行更新。这个需要自行添加版本号大小检查。
4.5.1 通过version.txt控制
4.5.2 通过menuconfig控制
选择应用管理 Application manager --->
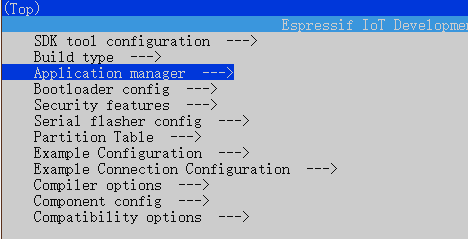
勾选 Get the project version from Kconfig 并在下面填写版本号。

4.6 开启HTTP服务器(可选)
编译链内 Python 有一个内置的 HTTP 服务器,我们这里可以直接使用它。我们将会使用示例 get-started/hello_world 作为需要更新的固件。
4.6.1 生成目标固件
使用示例 get-started/hello_world,此处执行idf.py build 会生成二进制文件get-started\hello_world\build\hello-world.bin。
4.6.2 创建HTTP服务器
- 使用工具链python创建服务器
进入存放需要升级的固件(hello-world.bin)目录。在此处创建HTTP服务器。
此处执行 python -m http.server --bind 192.168.61.67 8070会生成一个HTTP本地服务器。该服务器下对应\build文件夹下所有内容。(有的文章执行的python命令不同,是由于python版本不同造成的。)
- 使用HFS创建服务器
链接:https://pan.baidu.com/s/1MIAI5m4WQJdAZpqRAdvsXg 提取码:9m8y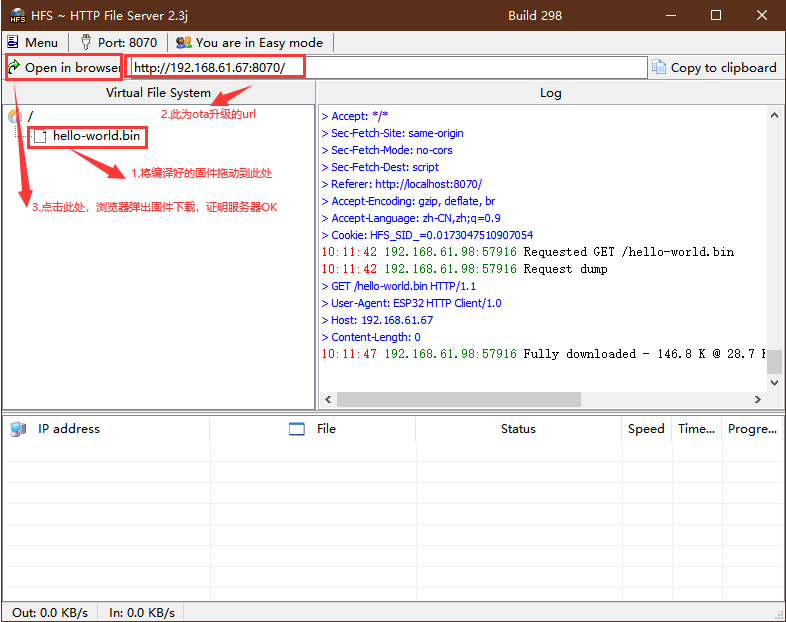
4.7 开启HTTPS服务器(可选)
- Shirt + 鼠标右键 打开 Linux shell
- 创建一个新的自签名证书和密钥
openssl req -x509 -newkey rsa:2048 -keyout ca_key.pem -out ca_cert.pem -days 365 -nodes
依次输入:(国家)、(洲/省)、(城/镇)、(组织名)、(单位名)、(httpd-ssl.conf中的ServerName 名称)、(邮箱)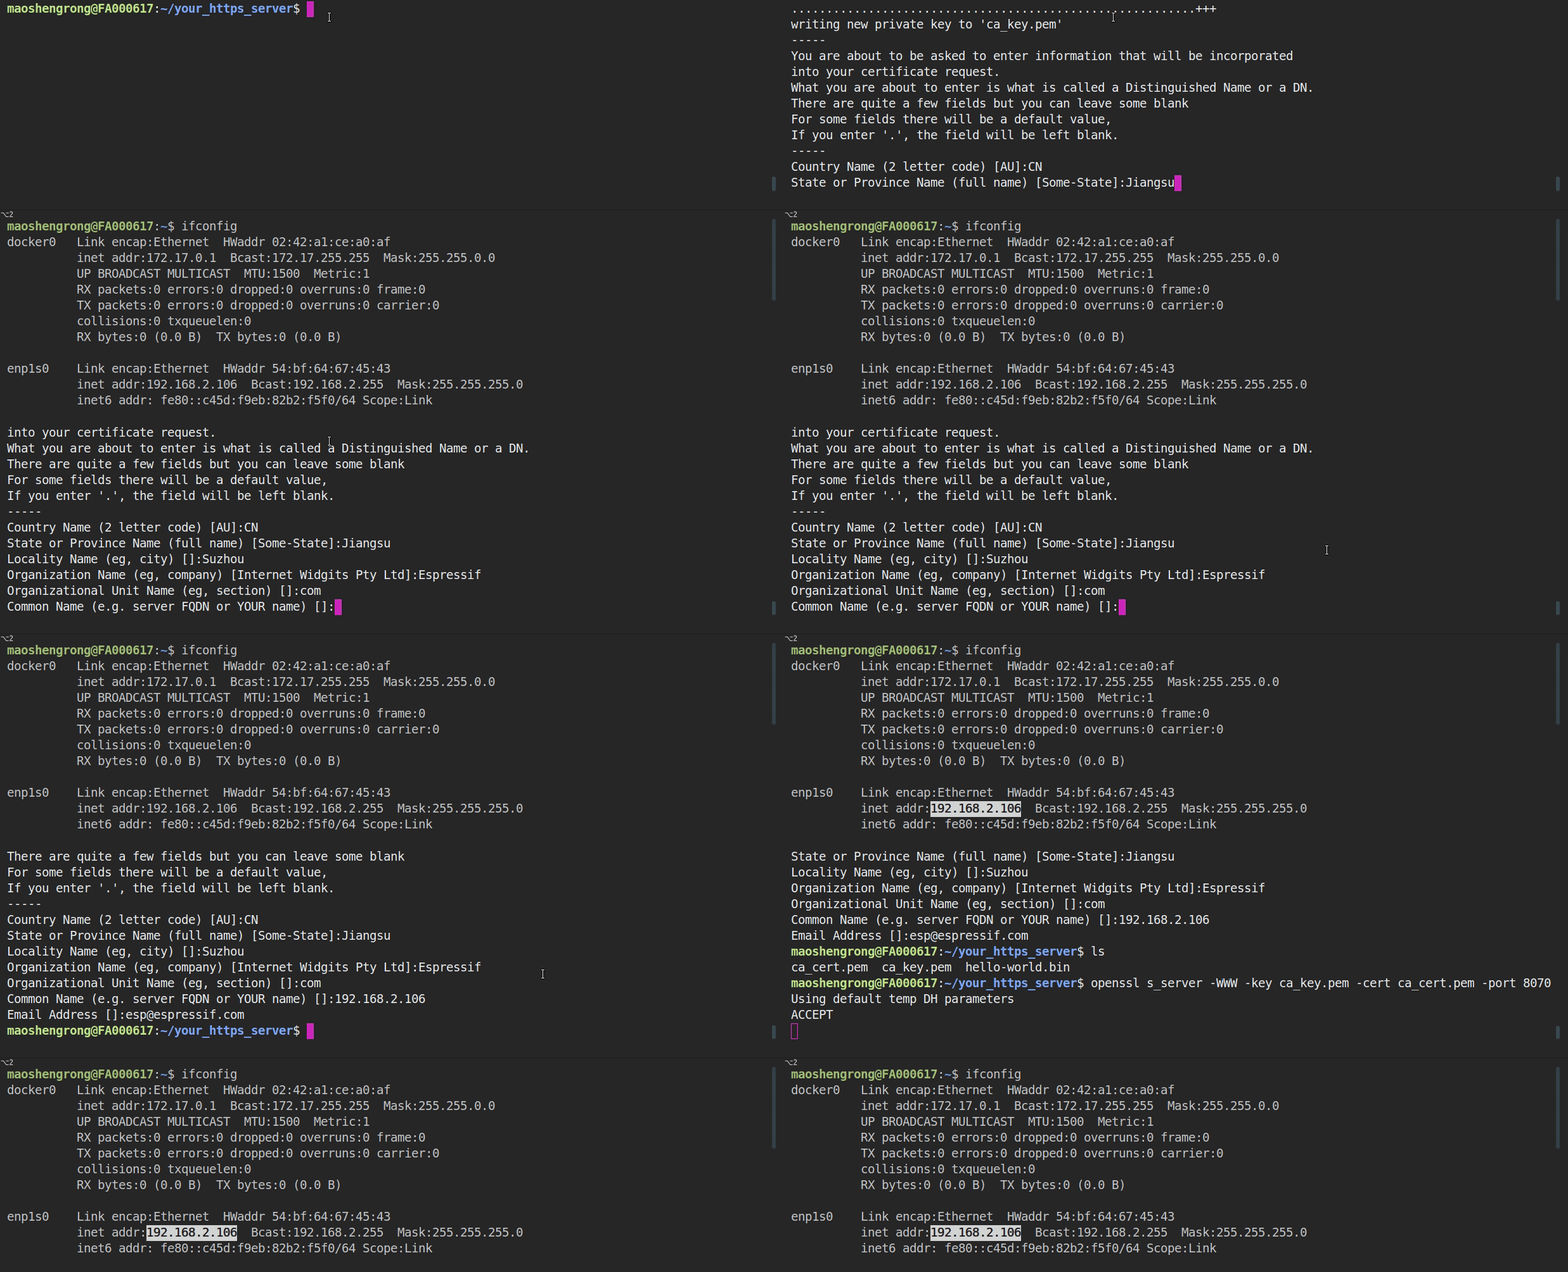
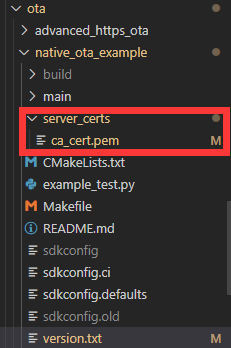
- 将生成的证书 ca_cert.pem 复制到OTA示例目录中的 server_certs 目录下,已存在则替换内容
- 创建HTTPS服务器
openssl s_server -WWW -key ca_key.pem -cert ca_cert.pem -port 8070
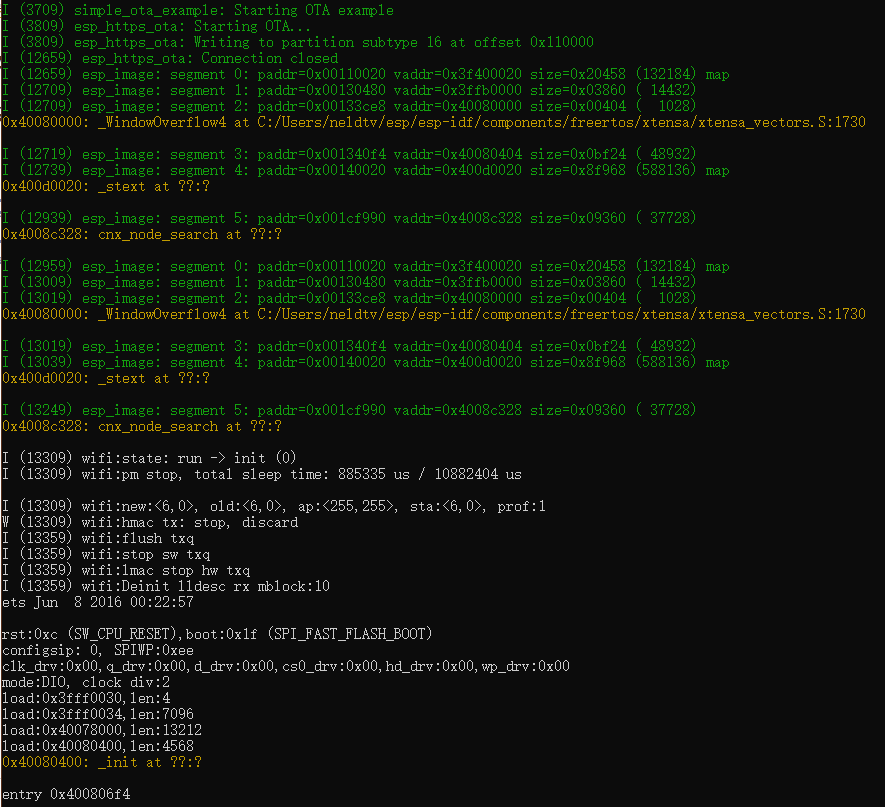
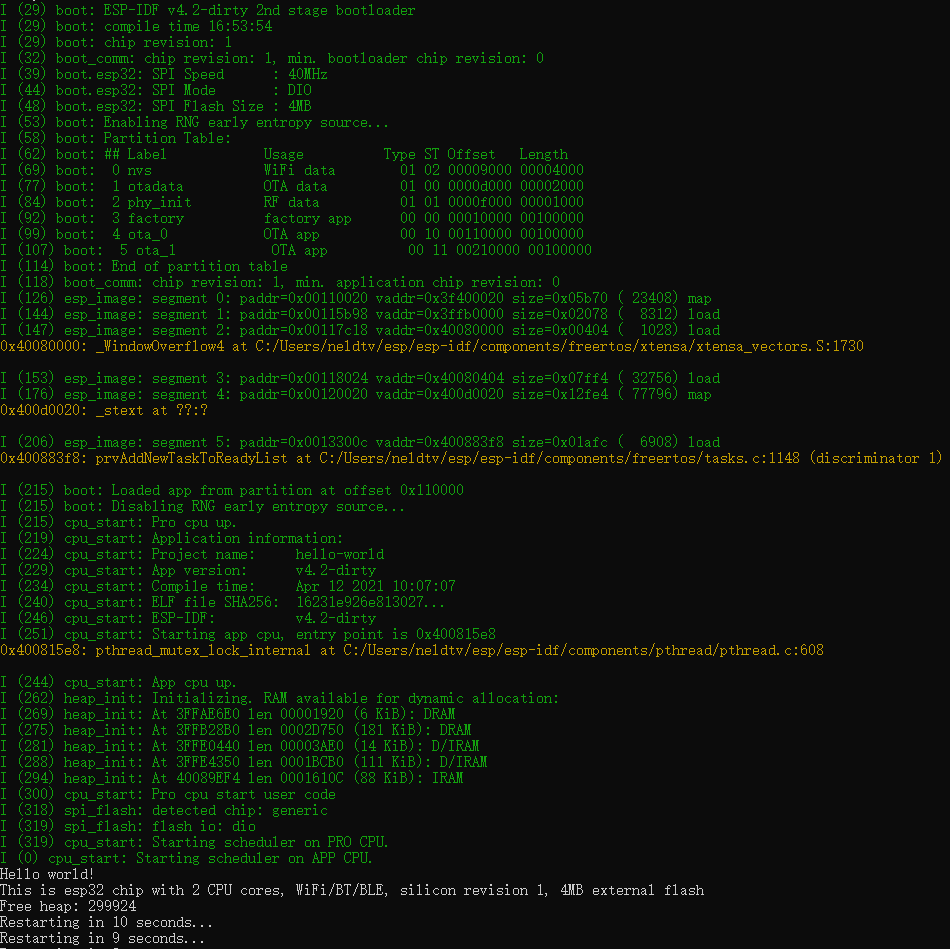
4.8 查看打印
涨知识

串口
串行接口是一种可以将接收来自CPU的并行数据字符转换为连续的串行数据流发送出去,同时可将接收的串行数据流转换为并行的数据字符供给CPU的器件。一般完成这种功能的电路,我们称为串行接口电路。
评论:
【ESP32 C++教程】Unit1-3 ESP32 Arduino 开发框架
ESP32 Arduino Framework是专门针对ESP32开发板的Arduino应用开发框架,为用户开发IOT应用、HMI应用提供一致的开发体验。

ESPConnect:基于浏览器的ESP32管理器
ESPConnect是一个基于现代浏览器的管理器,在你需要快速验证、调试、管理文件、检查状态的时候,它能帮你省下大量打开和切换重型工具的时间。

用ESP32做一个FM收音机
本文介绍两种使用TEA5767收音机模块实现FM收音机的方案,感兴趣的朋友可在此基础上实现更丰富的功能。
GPIOViewer:让ESP32引脚状态一览无余!
GPIOViewer 是一个强大的 Arduino 库,专门为 ESP32 芯片设计,可以实时监控 ESP32 芯片上的所有 GPIO 引脚状态。它可以帮助你快速直观地了解每个引脚的当前状态,例如高电平、低电平、输入、输出、中断等等。

ESP32 I2S音频:初识I2S通信与配置基础
在音频处理领域,I2S是一种广泛使用的通信协议,它专门用于芯片之间的音频数据传输。ESP32 作为一款高性能的微控制器,不仅支持 I2S 通信,还提供了强大的硬件接口和灵活的软件库,使其成为音频项目开发的理想选择。

小鹏物联网自动浇花套件
小鹏物联网智能浇花系统是照顾植物的好帮手,支持自动控制和手动控制两种模式,可通过电脑端和手机端查看数据和控制浇水。

ESP32 Arduino 开发框架
Arduino开发环境下适用于ESP32芯片系列开发板的应用开发框架。

【ESP32 C++教程】Unit1-2 C++类基础知识
本小节主要介绍C++ 类相关的基础知识,包括类的定义、继承、多态,范围作用域等。

【ESP32 C++教程】Unit1-1 开发环境准备
本讲主要介绍VSCode Arduino开发环境的搭建,及与Arduino IDE开发环境的比较。

ESP32 WebServer库处理表单请求
本文主要讲解WebServer库如何来处理表单请求。
